Note:
Decathlon Germany provided me with the Bikepacking bags for a test at my request. Therefore, this is advertising, mes amis!When I got to ride the Riverside Touring 920 bike last year, Riverside told me that they were also working on a Bikepacking bag line. And if they are doing this with the same passion and experience as they have developed the Touring 920, then I really wanted to test these bags.
In December, Decathlon sent me a selection of their Bikepacking bags for testing:
- The handlebar harness bag with pack sack
- The handlebar (additional) bag
- The saddle harness bag with pack sack
- The top tube bag
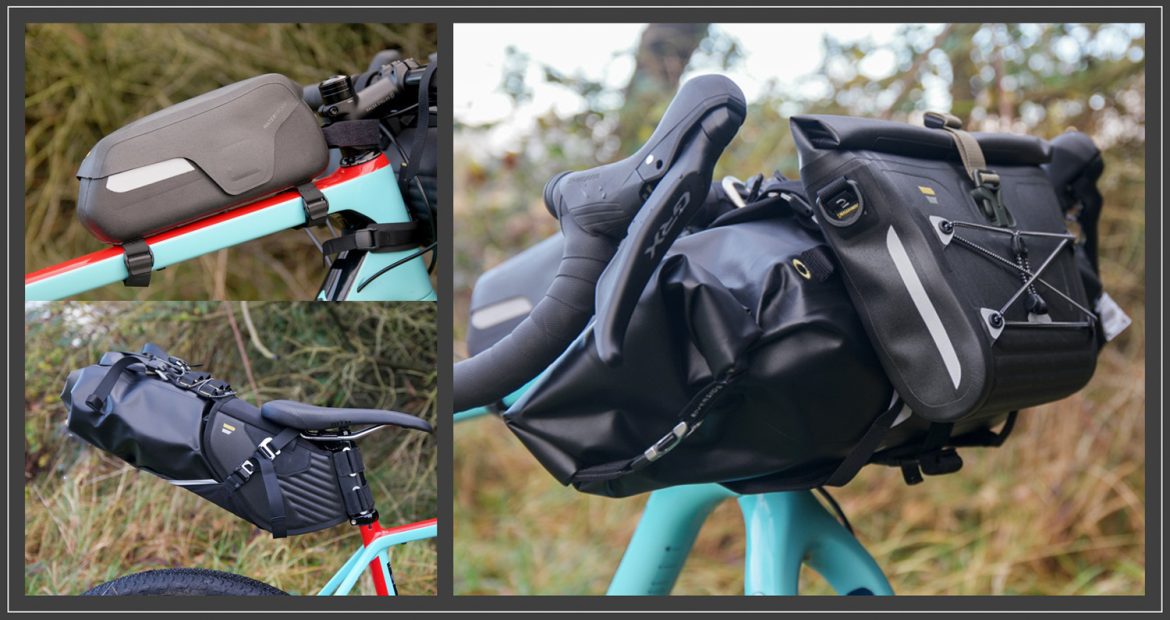
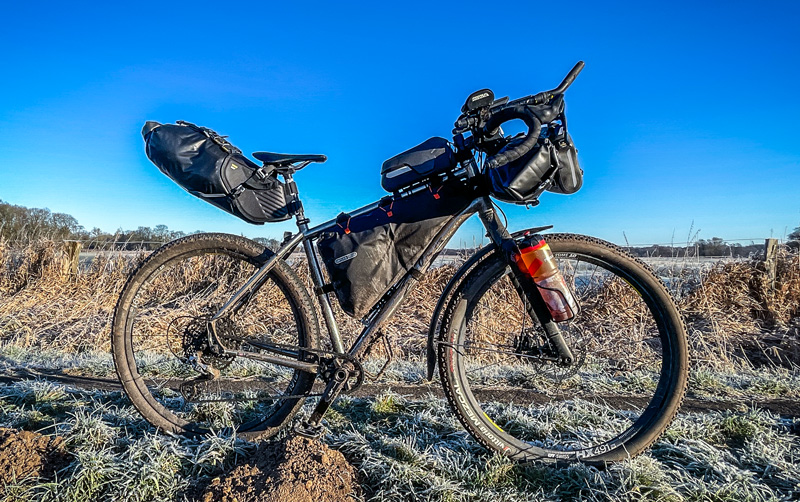
My first impression: The bags look very robust and very well thought-out. You can see that these bags have been developed by people who have plenty of experience with Bikepacking. For example, the waterproof top tube bag with openings for cables and magnetic closure. Or the saddle harness, with very easy-to-use tie-downs and a seatpost attachment that allows installation even when space is at a premium.
And then, of course, the price: we are in a range of 30-60 euros here and the total kit I tested would cost around 210 euros. Reasonably priced and good – even if a little heavier here and there.
Interestingly, Riverside focuses on the harness system. This means that the saddle and handlebars are simply strapped to holders that then take a pannier. The advantage: the pannier bag can be removed and reattached very easily without having to dismantle the entire construction. I am an absolute fan of the harness system and also very impressed by the simplicity of the Riverside system.
Unfortunately, there is no frame bag yet, but that is definitely coming and will then certainly be worth a look as well.
But let’s take a look at the bags in detail:
Riverside Handlebar Harness + Pack Bag
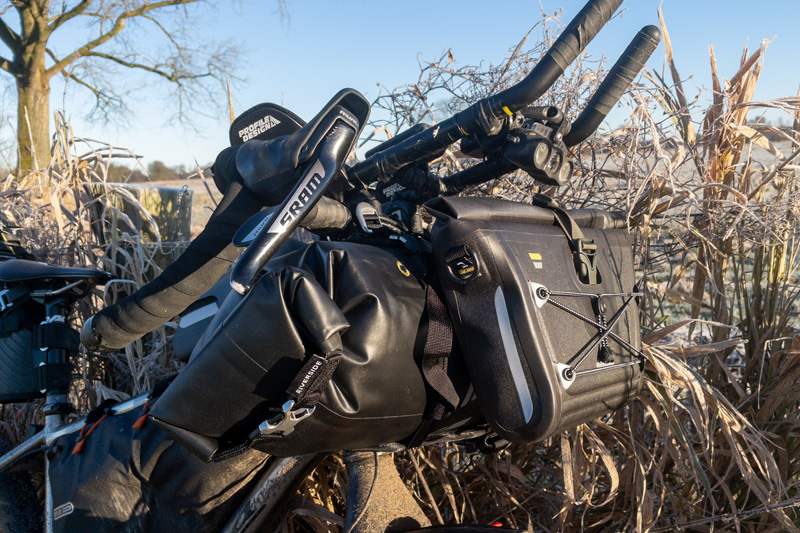
The handlebar harness mount is similar to the Revelate Designs harness system. The mount is made of EVA (ethylene vinyl acetate copolymer) with glass fibre reinforcement, is very robust and has three straps that then hold the pack sack. The harness mount is attached to the handlebar and head tube with a total of three straps.

On the handlebars, two silicone spacer profiles ensure the correct fit on the handlebars and the necessary distance from the shift and brake cables. These are fixed and tightened with one strap each. Adjusting the tension while riding is no problem, as the ends of the straps point towards the rider.
Once tightened, however, the straps hold very tightly, even in rough (and icy) terrain. The third strap fixes the harness shell to the head tube below the stem. Rubber protects the paintwork and the strap can be easily tightened.

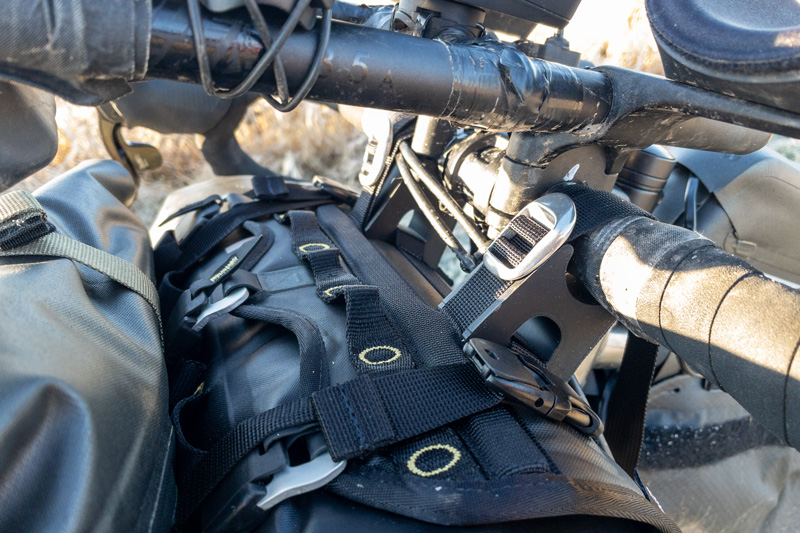
The harness shell has a non-slip coating on the inside, which is good for holding the pack. The straps have aluminium hooks that are hooked into the top of the harness receiver and then fixed by the straps with tilt-lock system. I really like the tilt-locks and they are easy to use with gloves.

At the bottom centre and at the top right and left of the harness shell there are click fasteners that serve to additionally hold the handlebar bag. There are also additional belt loops on the top of the shell to provide more transport options or to attach additional items.
The dimensions of the harness shell are 40x31cm and the load capacity is 8kg according to Decathlon. This is more than sufficient for Bikepacking. If you need or want to carry more than 8kg, you should look for classic travel bike bags. The harness shell weighs 492g according to the manufacturer, 500g when weighed.

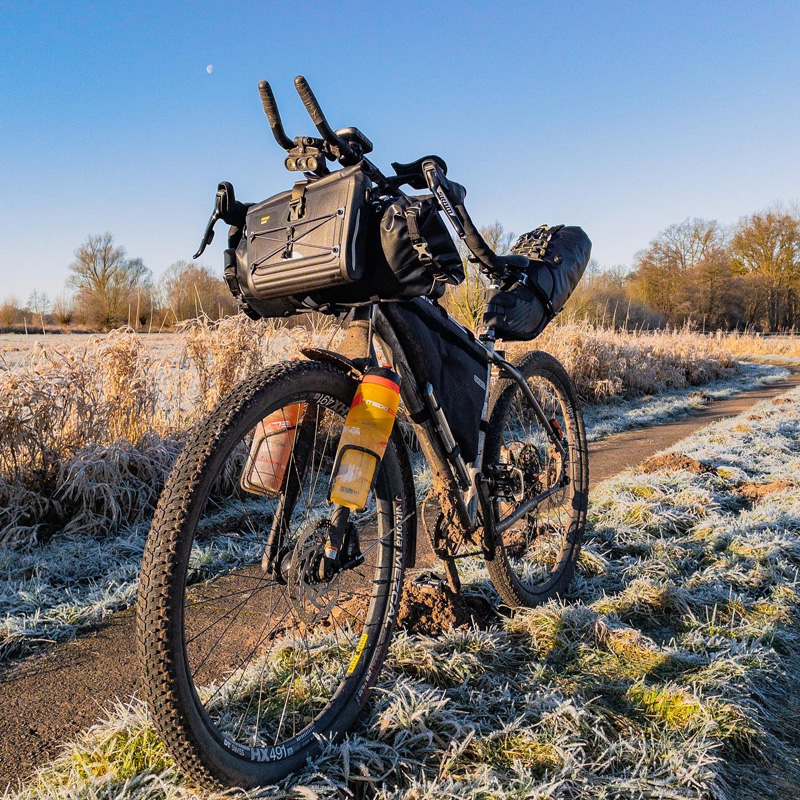
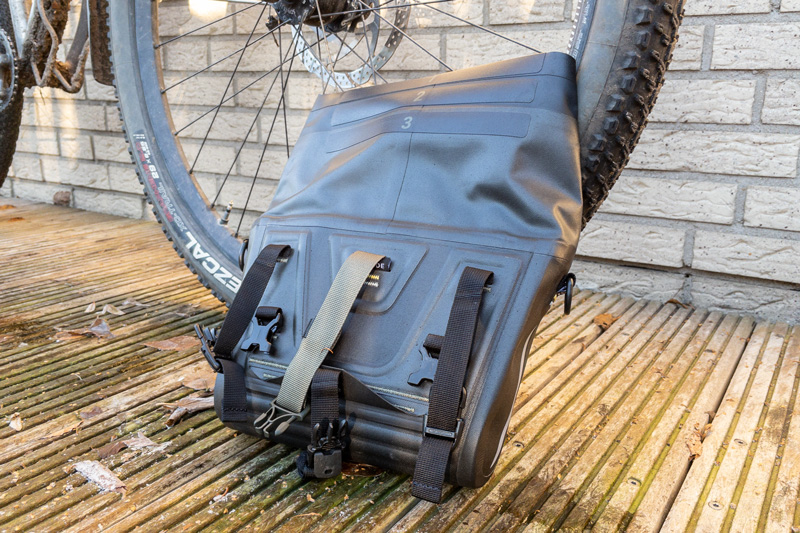
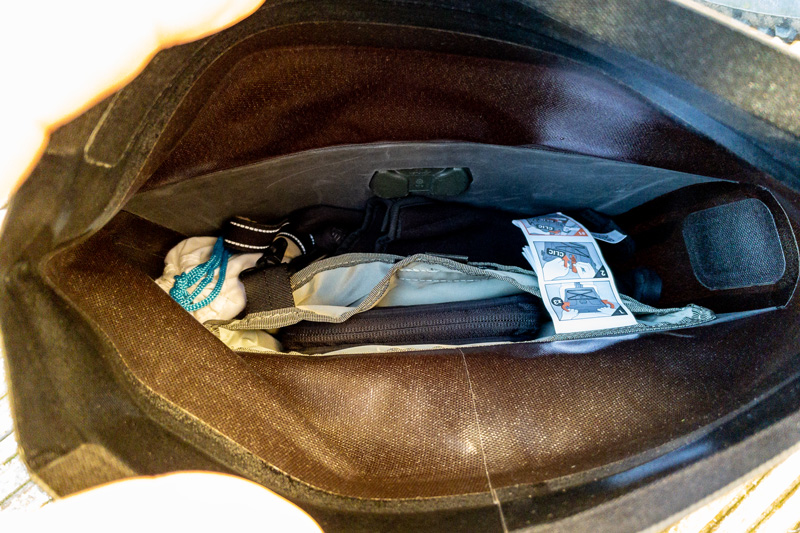
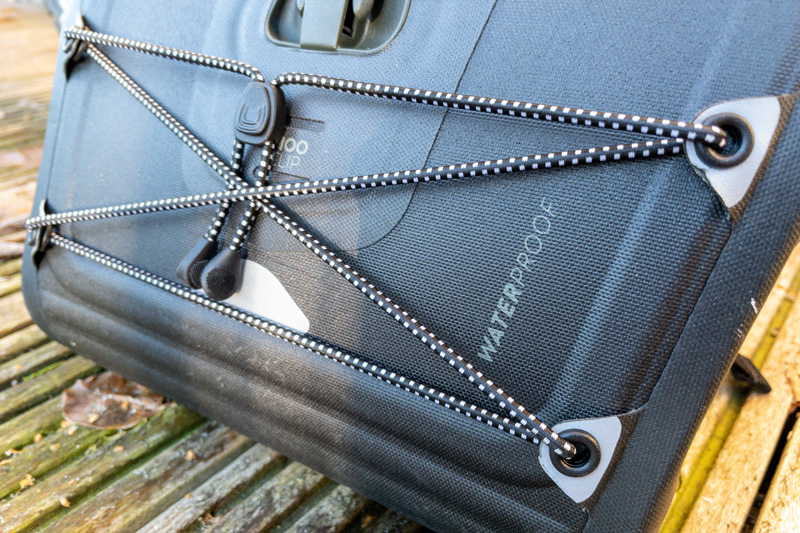
The waterproof (according to IPX6 class) pack sack has a maximum volume of 15l and can be opened from both sides. On the test trip I carried my sleeping bag, sleeping pad, down jacket, sleeping gear, washing kit and towel in it. It was very easy to compress (also thanks to the three clearly marked and printed rolling steps) and always fit well between my handlebars.
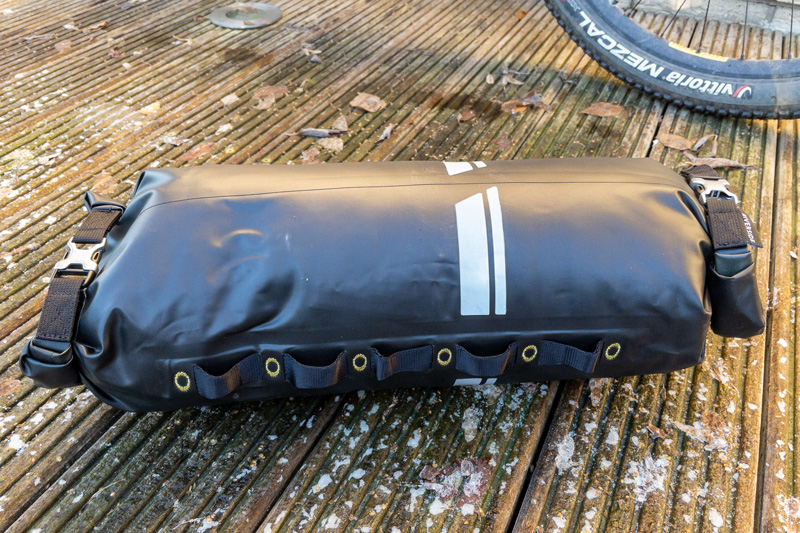
It has a row of attached loops at the front. These prevent the pack from slipping sideways in the harness shell. To do this, the harness straps can be passed through the loops on the pack sack.
The click closure of the pack sack is robustly sewn and made of aluminium and POM plastic (polyoxymethylene, for use in cars and electric vehicles). According to the manufacturer, the weight of the pack sack is 195g, weighed in at 250g. What I’m still missing from the pack sack is a valve for even better compression.

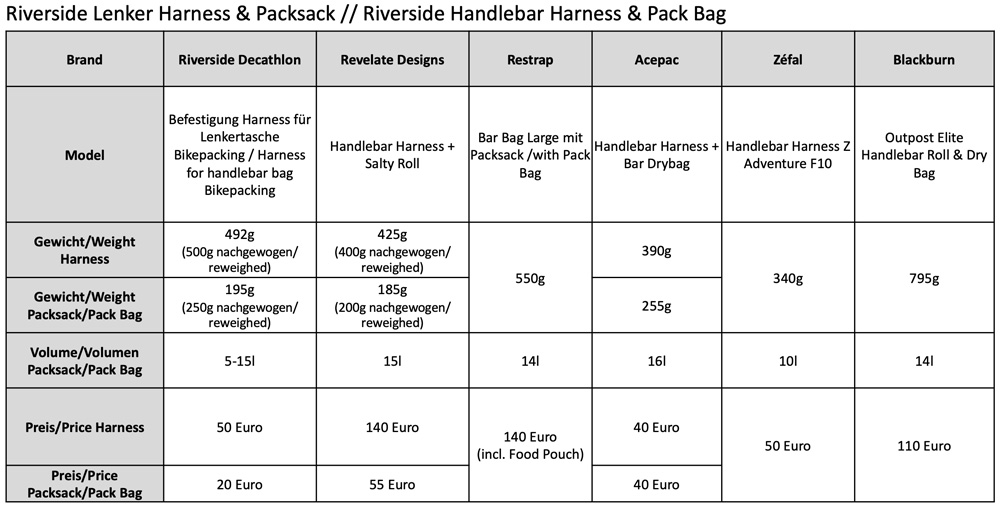
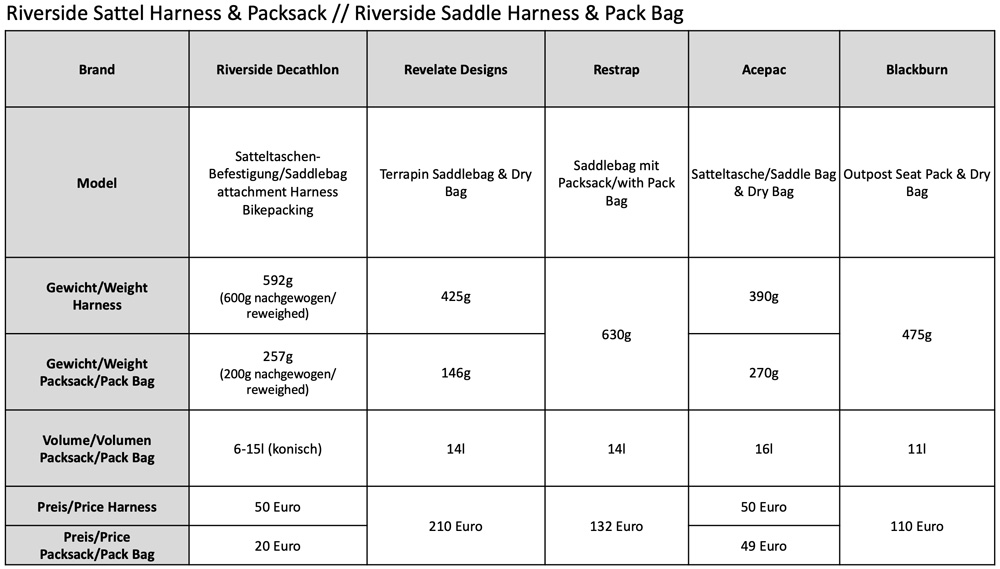
All in all, the harness shell and the pack sack look very good. To give you a better idea of what Riverside has to offer, I have put together a comparison with other harness manufacturers. There you can also see that the Riverside Harness is not one of the lightest, but also not one of the heaviest models.
Riverside Handlebar Bag
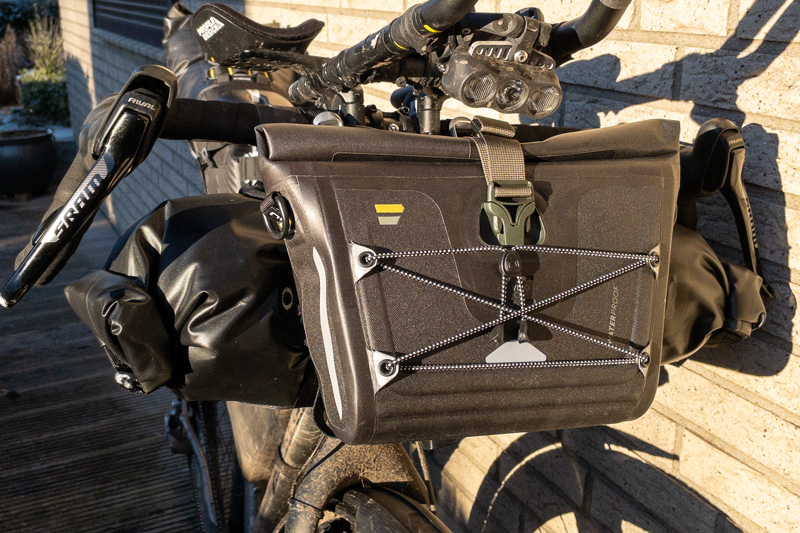
Riverside also offers a waterproof (IPX6) handlebar bag in their bikepacking line, which can either be clicked onto the harness or used separately. It is very easy to attach to the harness: three click fasteners are simply connected to the counterparts on the harness. Attachment and detachment are very quick.
The bag is very robust. Inside there is a pocket with two compartments where small items can be easily stored. It is made of polyester (PES) coating and thermoplastic polyurethane and is therefore form-stable. The handlebar bag holds a total of 3.5 litres. In addition to my wallet and documents, I also had food, a headlamp, a powerbank, cables, gloves, a scarf and a spare cap in it. And it wasn’t full yet.
The closure is rolled and then secured with a strap and click closure. At the front, the bag has an elastic band where more things can be attached. It also has reflective stripes for a bit more visibility.
In short: I think it’s good. With a weight of just under 400g, it is not a lightweight, but in return you get a very stable and above all waterproof handlebar bag that can take a lot.

Riverside Saddle Harness + Pack Bag
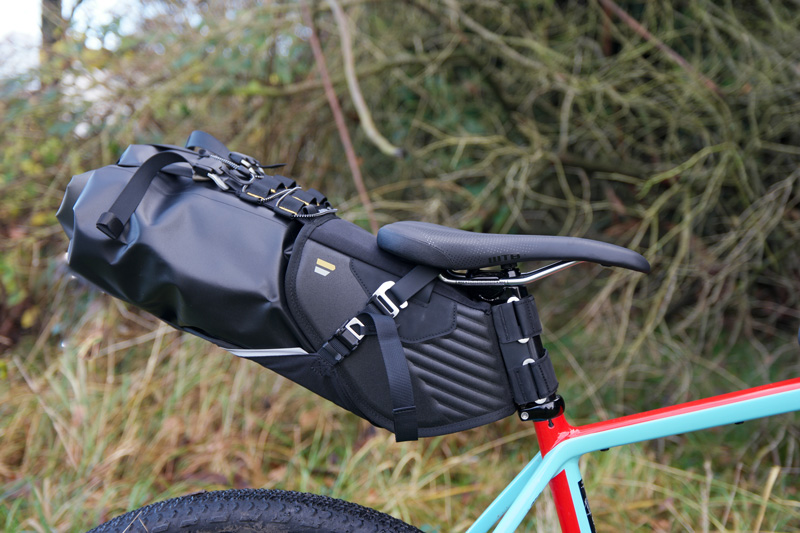
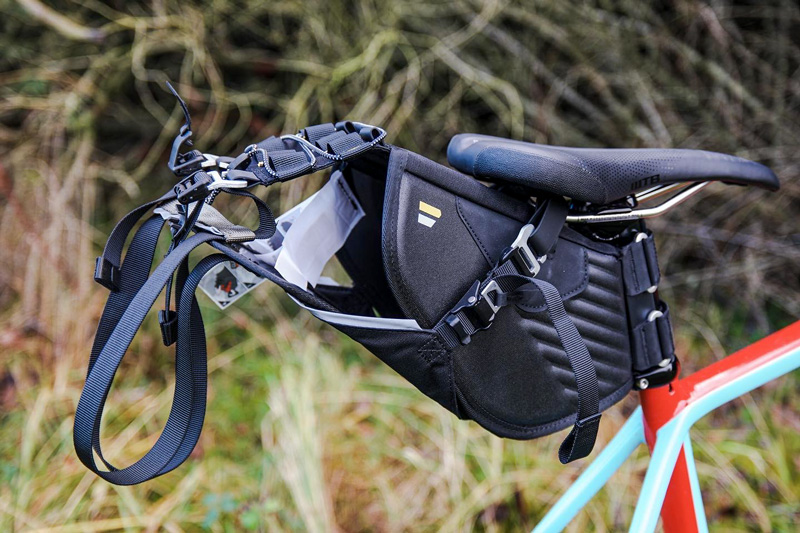
As with the handlebars, the Riverside Harness System for the saddle is quick and easy to attach. Two nylon loops are passed through the saddle rail and then connected to the harness mount with aluminium hooks. Then you press the plastic mount onto the seat post and fix it with the two straps. The good thing about the Harness mount is that it is only 10 cm long, so it is also suitable for bicycles that do not have a lot of seatpost space.
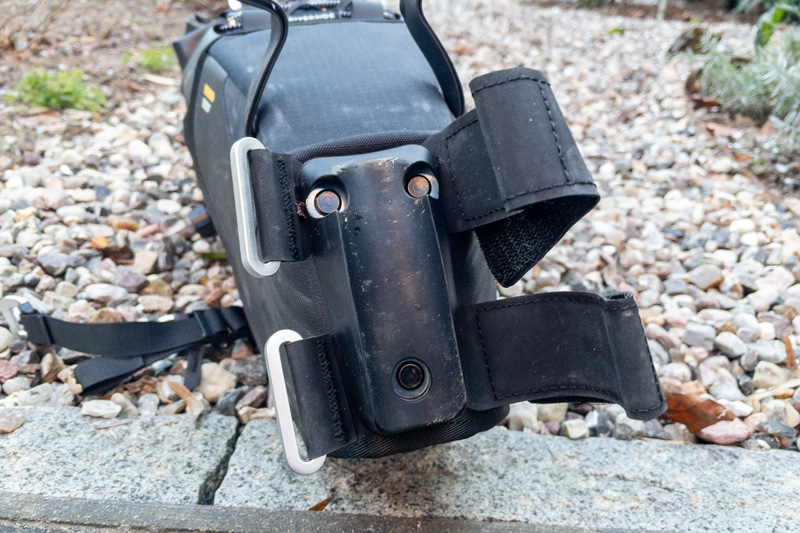
The harness mount has a plastic plate on the bottom towards the bike and thus also offers a little more protection against dirt.
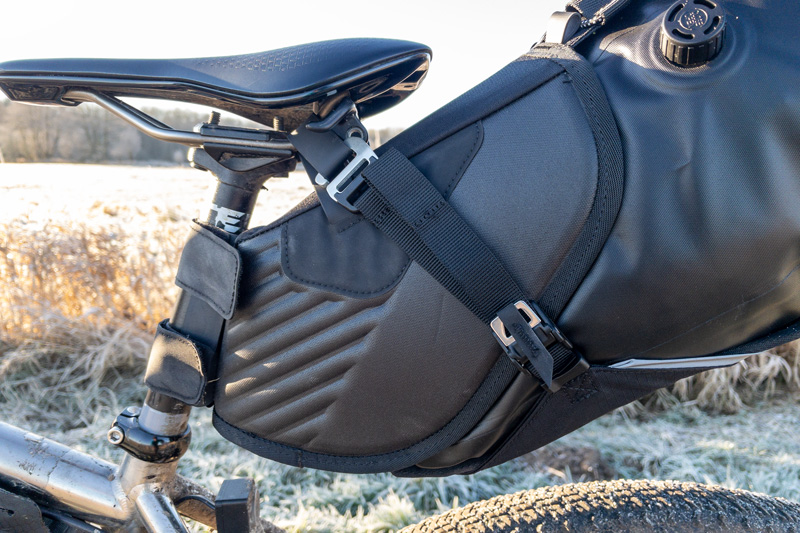
The pannier bag is then inserted into the harness and secured with the long straps. To do this, pull them over the pannier closure and attach the aluminium hooks to the loops provided on the top of the harness. Then simply tighten and fix the strap tension with the tilt locks. Then pull the straps on at the sides. Done.
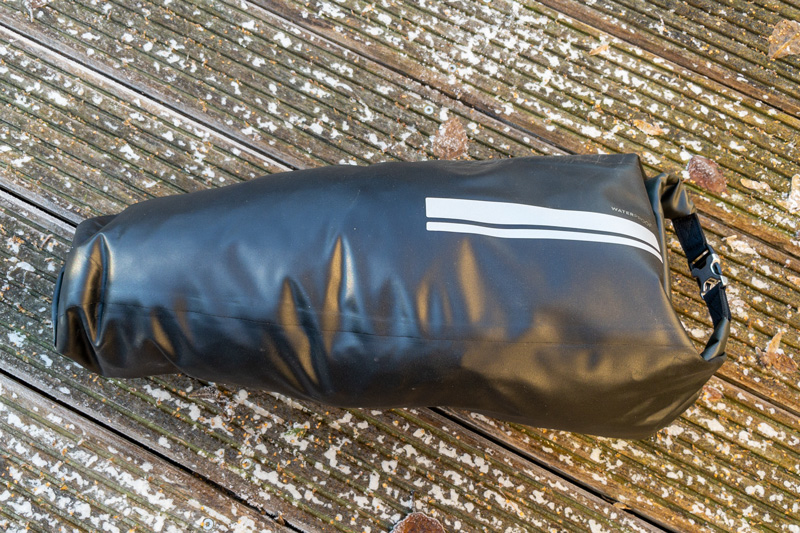
The pack sack is conically shaped and made of waterproof material (polyamide) according to IPX6. According to the manufacturer, it can be compressed from 6 to 15 litres. It also has a roll closure, but only on one side. It has a valve, which allows good compression.
I had my tent, tent poles, spare clothes, food and my rain trousers and jacket in this bag. I assume that the Harness System can also take a normal pack sack of the same size, even if it is not conically shaped. However, this would have to be tested separately.
Packing the pack sack in the harness is quick and easy. Particularly pleasant: once fixed, nothing wobbles, even in the terrain. A rubber band is attached to the top of the harness for attaching additional equipment.

The straps are also a comfortable length, which allows the whole system to be tightened when the pack is not so fully packed.
For better orientation I have again made a comparison table. There you can see that the Riverside solution is unbeatable in terms of price and, in my opinion, also offers very good quality.

However, it is also the heaviest solution in my comparison with other manufacturers. So if you have to pay special attention to weight, you should probably avoid harness systems or go for much more expensive solutions.
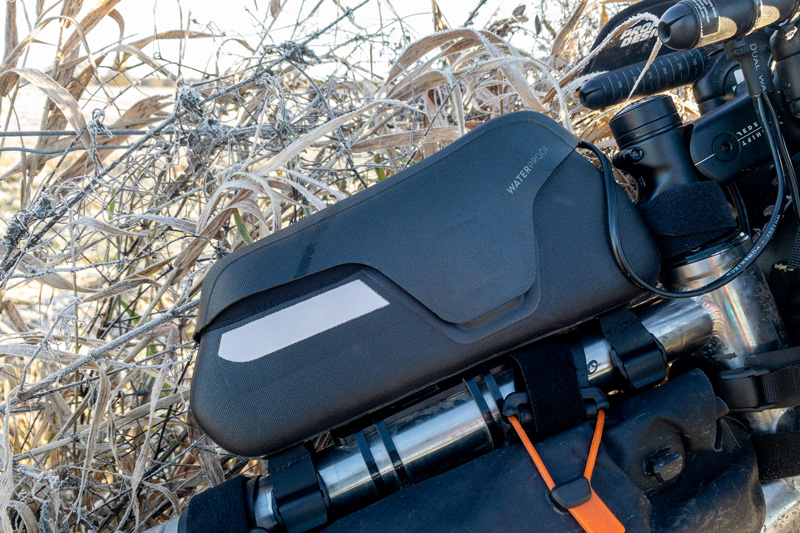
Riverside Top tube bag
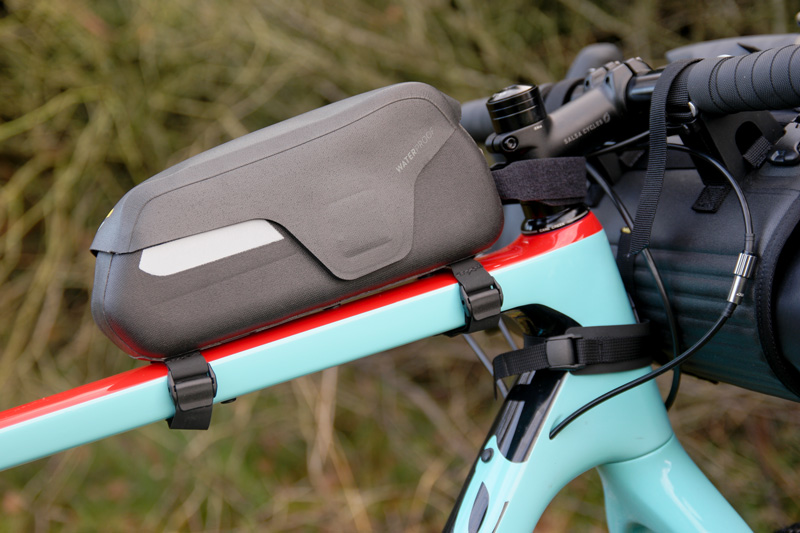
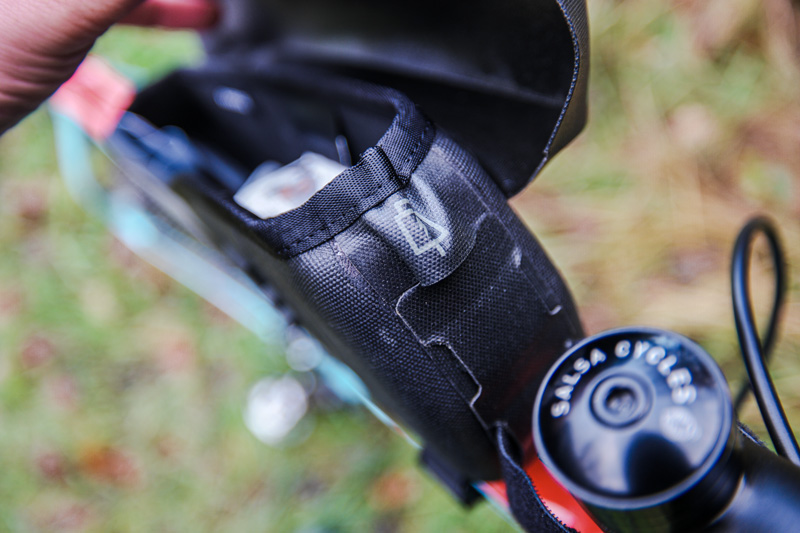
I was very impressed by the Riverside top tube bag: it has a slim design, is waterproof (according to IPX6), has a magnetic closure that works very well (it can also take a bit of overpacking) and an opening for cables (even for two). In addition, this bag can be fixed either with screws or with straps.
I chose the straps, which can be easily and quickly attached and fixed to the top tube. This is made possible by a tilt lock, which allows you to pull the strap tight and fix it in place. At the front of the head tube, the bag is attached as usual with a normal velcro strap.
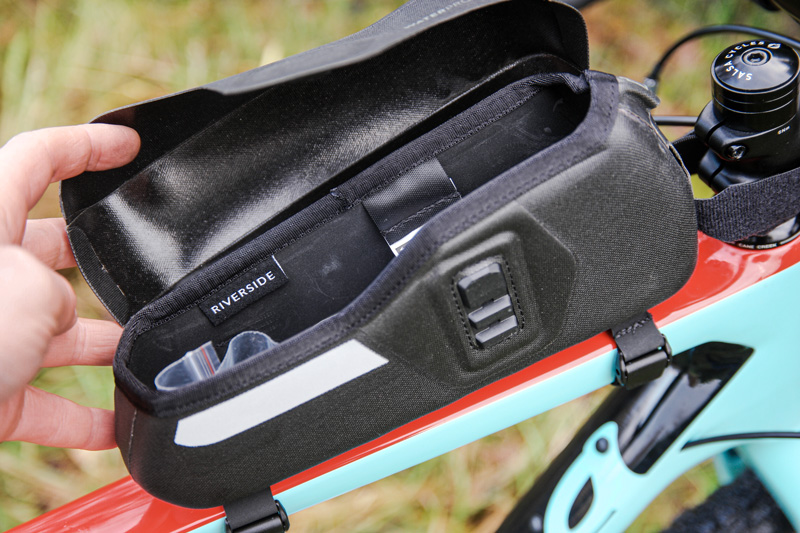
I had a thick bag of wine gums, mask, handkerchiefs and my Klite USB charger with two connected cables in the top tube bag. Still, the bag didn’t move or tilt much when I was riding. I found that very comfortable.

It reminds me a bit of the Apidura Racing bag, but I think the Riverside is better in this case. This is mainly because the polyester (PES) and polyurethane used keeps its shape and I can make good use of the 1l volume.
However, at almost 200g, it is also a rather heavy bag. If you don’t mind the few grams of extra weight, you get a very good, well thought-out and waterproof top tube bag for 30 euros, which will be a lot of fun on all bikepacking tours.

Conclusion
Of course, every test must have a conclusion. And you have certainly already seen it shine through: I can recommend this Bikepacking bag series from Riverside to anyone and everyone who wants to get into Bikepacking without getting into debt. And those who are looking for bags that are tough and can cope with many tours.
And also for the experts among us: take a closer look at the bags. The Harness System is well worth a look, even if you want to get away from the classic closed systems and are looking for something that is even easier, faster and more comfortable. You might have to factor in a little extra weight, but we’re talking about maybe 200-300g extra weight in total, if that. In addition, the harness system allows you to use existing packsacks, so you may not have to make an additional investment here and may also save a few grams by using an existing, lighter pack sack.
This makes the Riverside Bikepacking Line-up a tip for all those who do Bikepacking in touring mode or are looking for a few alternative bag systems for their bike tours.