Note:
I am reviewing Aerobar models from Profile Design. I made contact with Profile on my own initiative. I was able to buy one aerobar at a lower price, the other one was given to me for a test. Therefore, this is advertising, also because I mention many other brands and models.
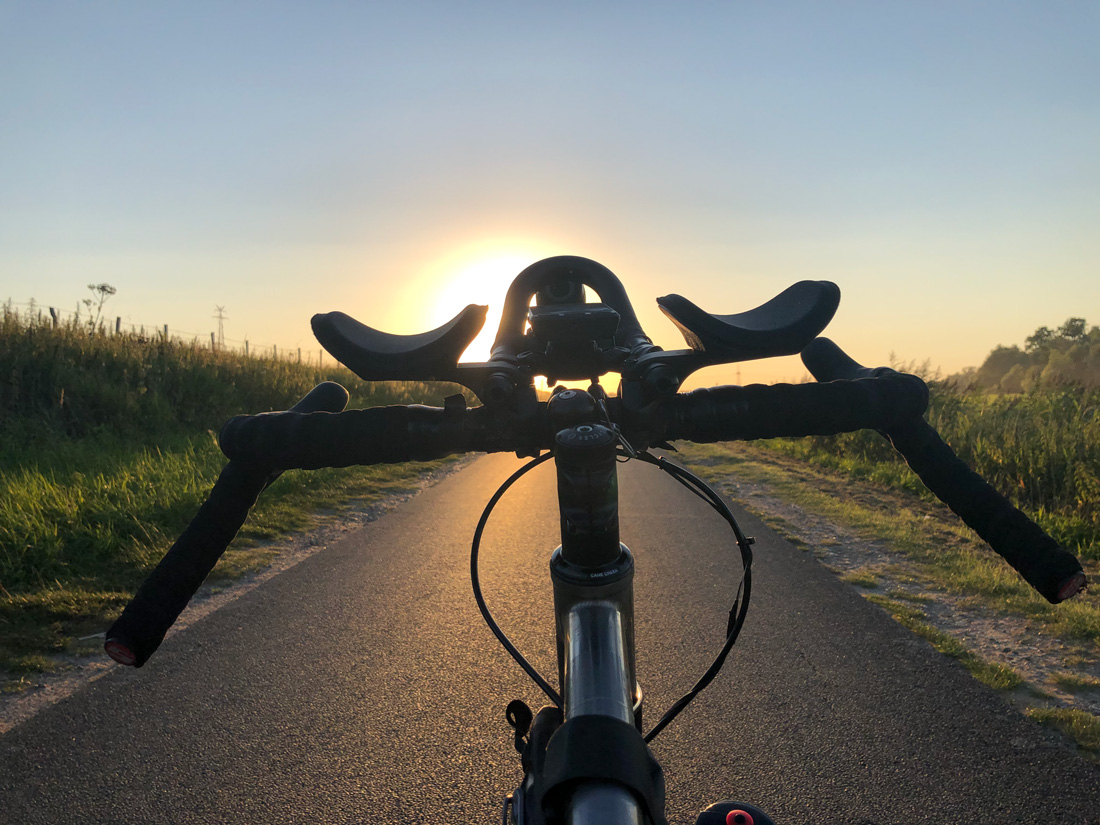
Aerobars, or handlebar attachments, were actually always something for triathletes or cycling professionals who had to complete time trials. But I couldn’t really get Bikepacking and Aerobars together.
I ride an endurance MTB with a drop bar and the various grip positions were usually enough for me. Even on longer rides, I never felt the need for “more”. Of course, every now and then I rested my forearms on the handlebars on longer passages.
In preparation for the Atlas Mountain Race, I saw many of my fellow cyclists riding with aerobars. But I dismissed that as “I don’t want to win, I just want to finish” and didn’t consider it any further. But during the race in Morocco it slowly dawned on me why it might be a good idea to think about handlebar attachments – especially if you plan to do this kind of sporty endurance Bikepacking for a longer period of time.
Back from Morocco, I started thinking about the topic. The advantages of a handlebar attachment are quite clear:
– Significant relief for the body due to a changed seating position.
– Less wind resistance due to less frontal area
– A noticeably higher speed that can be achieved
– And with it a significant power saving; some even say 10-20% compared to a normal handlebar riding position.
Now that I have been riding with Aerobar for almost a year, I can confirm all these points. Of course, I wanted to try it out first. During my research, I came across manufacturers such as Syntace, Profile Design and Redshift. Each of them had very good products. But I didn’t want to spend so much money on something I didn’t know if it would suit me at all.

So I ordered an M-Wave handlebar attachment from Messingschläger and installed it. The first kilometres are getting used to the system. You learn to control and balance the bike differently, and you should also practise riding it on rough surfaces. After all, gravel is everything but flat.
For me, the aerobars were a small revelation, because they actually led to a very pleasant relief and more comfortable riding style, especially when riding fast. I could simply lie down in the handlebars, relieve the hands and build up speed. And as a side effect, they also made me faster. Sometimes up to 3-5 km/h.
But of course there is always a but – in this case three:
– A handlebar attachment must be well adjusted and adapt optimally to the riders requirements. This can mean a longer adjustment period in which one adjusts the angle, the distance between the handlebar parts, the length of the attachment and also the height.
– Above all, however, it means that the space on the handlebars is drastically reduced and one may well have to look for alternatives for mounting lights and navigation equipment. In addition, attaching a handlebar pack can be a problem.
– And for the ultra-light fans: such a handlebar attachment always means additional weight, sometimes more than 500g. From my point of view, this is balanced out by the comfort and the higher speeds, but on the mountain the handlebar attachment doesn’t matter.
From M-Wave to Redshift to Profile Design
Aerobars come in different shapes. I’ll limit it to the L- and S-shape, also called L- or S-bend. In principle, both letters indicate the type of handlebar attachment bend/shape.
An S-shape is more sporty and puts the rider in a more “stretched” position. An L-shape makes it possible to grip the handlebars better at the ends at the front and thus to get a little more steering.
In Bikepacking, both shapes are equally common, because they have a lot to do with personal preference.

After the M-Wave, I was also able to test the Redshift Aerobar in L-shape. The advantage of the Redshift is that you can detach it from the handlebars very quickly by means of a click lock, which is usually not feasible with the other handlebar attachments because they are firmly screwed to the handlebars.
I liked the Redshift, but wanted to keep looking around. My shortlist had already fallen on the Profile Design Sonic Ergo 35a, but the Syntace C3 also still had a good chance. This one has a special shape, called Helix, and looks like an iron that has been bent too much in the heat. The Syntace is supposed to be very comfortable and especially suitable for long-distance Bikepacking.
But I’m more of a friend of the classic shape, which is why I finally decided on the 35a from Profile Design.
Through Tim I got in direct contact with Profile Design and was able to buy directly from the manufacturer. The delivery included the then new Sonic Ergo 45ar, which I was supposed to try out and give feedback on.
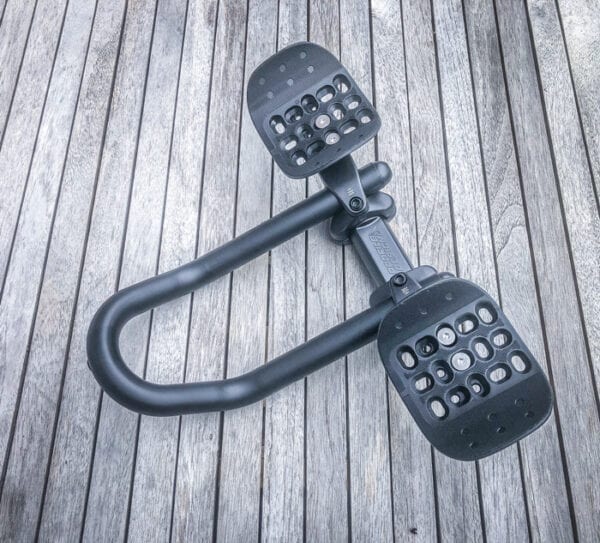
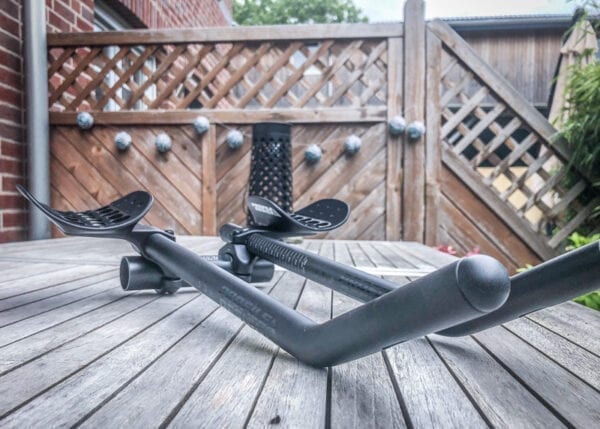
Introducing the Profile Design Sonic Ergo 45ar

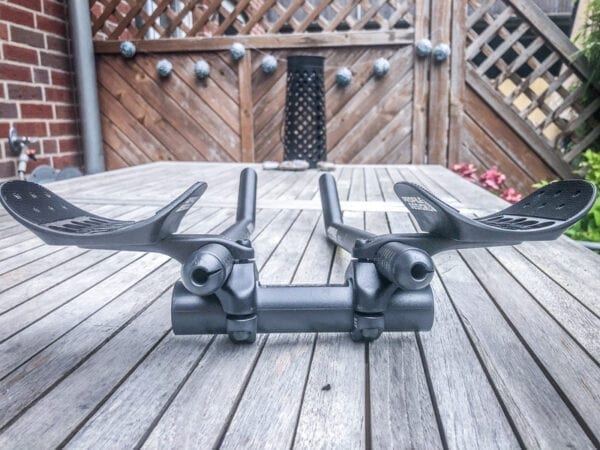
I would classify this handlebar extension in the compact class, because firstly it is rather short and secondly it is closed at the front.
The length of the 45ar is 24cm (I measured 22cm), which for me and the Salsa Fargo means that I have to put my upper forearm in the armrest to be able to grip the front. Most of the time, however, I just ride with my forearms and leave my hands loose at the front.

The width of a bars rack is also an individual question. There are time trial cyclists who push both handlebar supports together as much as possible and then ride elbow to elbow. And then there are the riders who leave a lot of space and use the trailers more as multi-bar handlebars. I’ve also seen trekking bike riders who had installed an aerobar, but turned it extremely upwards so that they could use it while sitting upright.

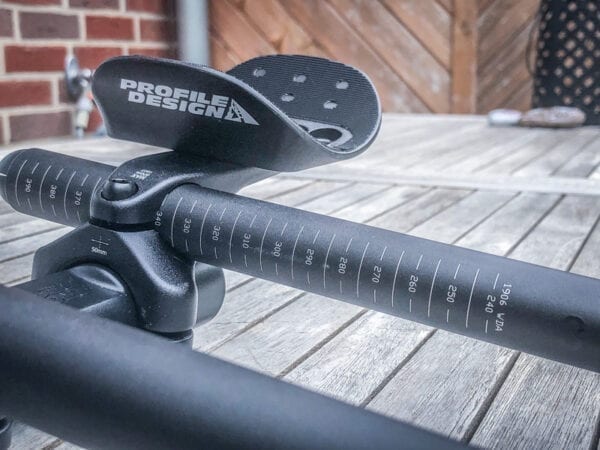
The Sonic Ergo 45ar has a predefined width of 10 cm (measured from the centre of the tube to the centre of the tube on the handlebars), which is a suitable distance for me. The arm supports add a little more space: I set these to 22cm (pad centre to pad centre) on the 45ar. However, these can be set to either 124mm or 290mm width. In return, you can attach and adjust the arm rests in a very versatile way.

Profile Design says that up to 80 different positions are possible. Once they are adjusted, the very comfortable pad is attached with Velcro. Don’t worry, it holds tight and doesn’t slip.
Summary Profile Design Sonic Ergo 45ar

I rode the Sonic Ergo 45ar for over 1,500km and also rode it on the Orbit360 in Schleswig-Holstein. After getting used to the shorter attachment at first, I got used to it pretty quickly and found good positions for speeding on the track. Most of the time I steered the bike using only my forearms and folded my hands in front of the headlight and relaxed. In addition, I was able to arrange the hose of my hydration bladder with the aerobar just fine.

But I noticed that on the one hand I prefer a longer version. And I wanted a little more height. The optimal aerobar position for me when Bikepacking is a bit more upright than when time trialing with a road bike. Actually, for everyone who rides handlebar attachments, a measurement or bike fitting is a good idea. Because then the optimal position and height for riding in the aerobar can be found and adjusted.

Profile Design recommends the Sonic Ergo 45ar as the ideal addition to a road or gravel bike. From my point of view it is, because the handlebar attachment needs a more stretched geometry. I sit quite upright on my Fargo and therefore have a different support point (middle forearms). Normally the forearms rest just behind the elbow and the hands grip the handlebar attachment in front. Therefore, in my opinion, the 45ar is more suitable for racing, cross or gravel bikes.
According to Profile Design, a special feature of the 45ar is that the arm rests are behind the handlebars (i.e. towards the body), which is why the reach is shortened accordingly. I only noticed this after I had read it. From my point of view, the arm rests are at the same height as the handlebars or slightly behind them. Sensitive riders may notice a difference.

The weight of the Sonic Ergo 45ar is 545g. The official price is 170 euros, but the handlebar attachment is already available on the open market for 150 euros.
Official data on the Ergo 45ar:
– Diameter handlebar clamp: 31.8mm (26.0mm with shims).
– Armrest: Ergo / 10mm pads
– Armrest width: 124mm to 290mm in 18,5mm steps
– Armrest offset: -70mm to -17.5mm in 7.5mm increments
– Armrest height: Minimum is 60mm and can be increased up to 130mm (70mm spacers added)
– Armrest width: 100mm
– Internal cable routing possible
– Colour: Matt black
– Weight: 545g
– Price: approx. 160 Euro
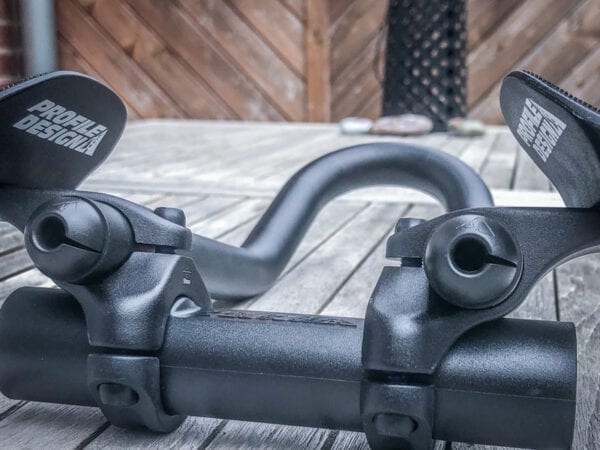
Introducing the Profile Design Sonic Ergo 35a

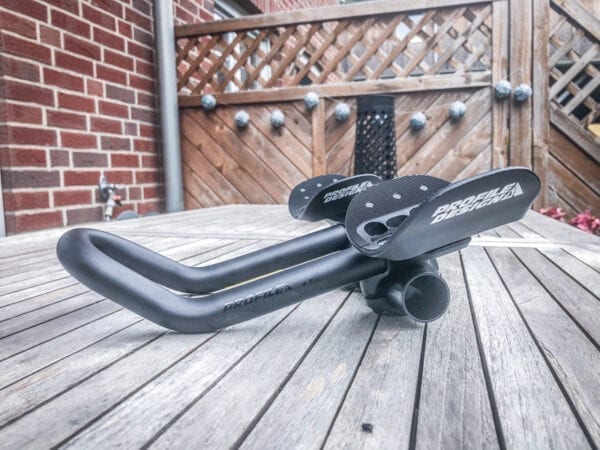
After the 45ar, I now have my real favourite on my bike: the Sonic Ergo 35a. This is a classic aerobar with two separate “arms” that are mounted on the handlebars accordingly.

With 40cm, the 35a is much longer than the 45ar and allows me to be properly positioned in the handlebar extension and to be able to grip the ends well with my hands at the front and thus steer. The 35 stands for the angle at which the extension ends are bent upwards.

I used a spirit level and a folding rule to measure the distances. On the handlebars I chose a tube spacing of 11cm. This gives me a very relaxed arm or elbow distance. The handlebar tubes run more towards each other towards the front, which is why the distance at the front is only 9cm. This is also due to the fact that I turned the handlebar tubes in so that the ends lean more towards each other. This gives me a better grip position and I don’t have to twist my hands.

The width of the arm rests (measured from centre pad to centre pad) is 23cm. According to Profile, it can be increased up to 29cm apart.
As written above, I have now also installed spacers on the 35a to get higher. The basic height of the 35a is 60mm. With so-called risers, this can be increased up to 130mm. If you’re wondering who rides with a handlebar attachment that is 13cm above the handlebar, you should take a look at Jonas Deichmann’s handlebars, with which he rode through Africa. Long-distance cycling is often more about relief and comfort than about looks.

For me, at least, the 2cm extra height is enough, which allows me to speed very comfortably. Even on rough terrain, I always have good control and can take the strain off my body.
Preliminary verdict Profile Design Sonic Ergo 35a

I have been riding the 35a for almost 1,000 km now and they are my current choice on the Salsa Fargo. I want to ride the Silk Road Mountain Race with them this year and all the preparations leading up to it (Orbits for example).
From a current perspective, these aerobars are a great fit for me. I thought at first that I would have to shorten the tubes, but they are just right in length. I currently leave them about 4cm above the handlebars.
I will probably also change the cable routing to the lamp, because the Profile Design Aerobars have internal cable routing, which is ideal for light as well as electronic cable-connected gears, if you want to attach buttons to the front for switching electronic rear derailleurs.
The 35a is priced at 160 euros, but it is also available on the market for just under 100 euros.
Official data for the Ergo 35a:
– Diameter handlebar clamp: 31,8mm (26,0mm with shims)
– Armrest: Ergo / 10mm pads
– Extension length: 395mm with length adjustment over 100mm (shift)
– Armrest width: 124mm to 290mm in 18.5mm increments
– Armrest offset: -70mm to -2.5mm in 7.5mm increments
– Armrest height: Minimum is 60mm and can be increased up to 130mm (70mm spacer added)
– Internal cable routing possible
– Colour: Matt black
– Weight: 559g
– Price: approx. 160 Euro

Upgrade your Aerobar
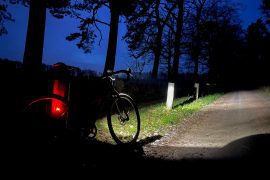
You have already seen it in the photos: Handlebar attachments always require a different management of navigation device and light on the handlebar. To be able to attach these, there are so-called handlebar bridges on the market. However, these are often limited in width. That’s why I use electric tubes. These are tubes made of hard plastic that you can buy at a DIY store. They have a diameter of 2-3 cm and are ideal for classic lamps and navigation mounts.

At the moment I have two of these self-made bridges on the handlebars: one for the front light and one for the navigation system. I sawed off the width of a piece of electrical pipe and drilled 8mm holes in the ends. Then I clamped the piece of pipe between the outriggers and fixed it to the outriggers on both sides with two cable ties each (through the drilled holes). Then I taped the tube as well as the connection points on the handlebar tube with Gaffa for additional stabilisation.
The tube doesn’t have to be very strong, but it should fit tightly and not vibrate while riding.
This type of attachment has more than proven itself for me, even in rough terrain.
Aerobar and bags
If you are considering handlebar attachments, you will soon realise that handlebar rollers/handlebar bags and attachments can get in the way of each other.

I have no problems with this and the Revelate Harness System is a solution that has proven itself. The same applies to the Ortlieb front roller. Of course, access to the Revelate Egress or Ortlieb Accessory Pack while riding is restricted by the trailer.
However, for fans of lightweight packing, there are also bag solutions specially made for aerobars. For example, the Apidura Racing Handlebar Pack or the Restrap Race Aero Bar Bag.
And if you would like to delve further into the topic of handlebar attachments/aerobars, you will find more background information and inspiration in this special by Alee aka CyclingAbout:
Bikepacking Aero Bars: Increase Your Comfort And Speed On Your Bike Adventures

I’m currently deciding on my first set of aero bars for ultra endurance and found this review very help, many thanks.
Which mounts are you using for the dynamo light?
Hi Rafael,
I use this one busch+müller
Martin
Hey,
On the 45ar, you have a couple of joint bars attaching where you mounted your light, etc. What did you do to get those on the aero bar. Thanks.
Hi,
For this I have taken electric tube from the hardware store and mounted with cable ties on the aerobar. I measured the distance, then sawed the tube to size, drilled holes through the ends and then fixed the tube at both ends with cable ties on the aerobar. Then wrapped with duck tape. Holds very stable.
Martin
Perfect. thank you. Good idea!
Hi! I read your article with great interest since I’d like to buy one of the two aerobar models you tested and I have no experience with bar extensions.
I’m not a racer, just a passionate gravel rider and bikepacker. Last summer I rode my Cannondale Topstone2 from Helsinki to Lapland with an average of 100km per day and I thought it would have been nice to have an additional hand position.
The problem with bar extension is that you can’t simply try and send back. I’d like to ask you what model you think would work better for me? I’m interested in comfort rather than speed and I need space for handlebar bag and electronics (Garmin, lights). Can’t decide between regular skis and the round 45er.
Danke!
Hi Marcello,
Unfortunately, I can’t help you with that, because it’s always an individual thing. I just bought a few cheap aerobars and tried them out to see how they fit. And then later the Profile Design.
Martin
Hi Martin,
thank you anyway. I wish you a nice day
Marcello